iPhone Camera Tricks to Instantly Improve Your Photos
iPhone Camera Tricks
iPhone Camera Tricks
The iPhone camera has revolutionized the way we capture memories. With every new generation, Apple enhances the camera’s capabilities, giving users professional-grade photography tools in their pockets. However, to truly get the most out of your iPhone camera, it’s not just about pointing and shooting. Hidden within the software are features and techniques that can instantly elevate your photos from average to extraordinary.
Whether you’re a budding photographer or just want to take better pictures for social media, this guide to iPhone camera tricks will unlock the secrets behind stunning shots.
The Ultimate Guide to iPhone Hidden Features
1. Use the Grid for Perfect Composition
Photography is as much about composition as it is about the subject. One of the simplest tools to help you compose balanced, eye-catching photos is the grid feature.
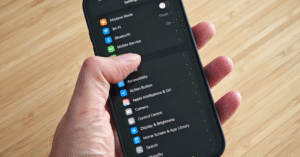
How to Enable the Grid:
- Go to Settings > Camera
- Toggle on Grid
This overlays a 3×3 grid on your camera screen. It helps you apply the rule of thirds, a compositional technique where you place your subject off-center to create more dynamic and engaging images.
Pro Tip:
Align your subject’s eyes or horizon with the grid lines for a more compelling shot.
2. Focus and Exposure Lock
iPhones automatically adjust focus and exposure based on what’s in the frame. While that’s helpful, it can also result in fluctuating brightness and focus. The AE/AF lock feature gives you total control.
How to Use It:
- Tap and hold on the subject in your viewfinder
- A yellow box will appear with “AE/AF LOCK” at the top
Now, your focus and exposure are locked in place—even if you move the camera.
When to Use:
- Shooting in changing light
- Taking portraits with strong background contrasts
- Capturing moving objects without losing focus
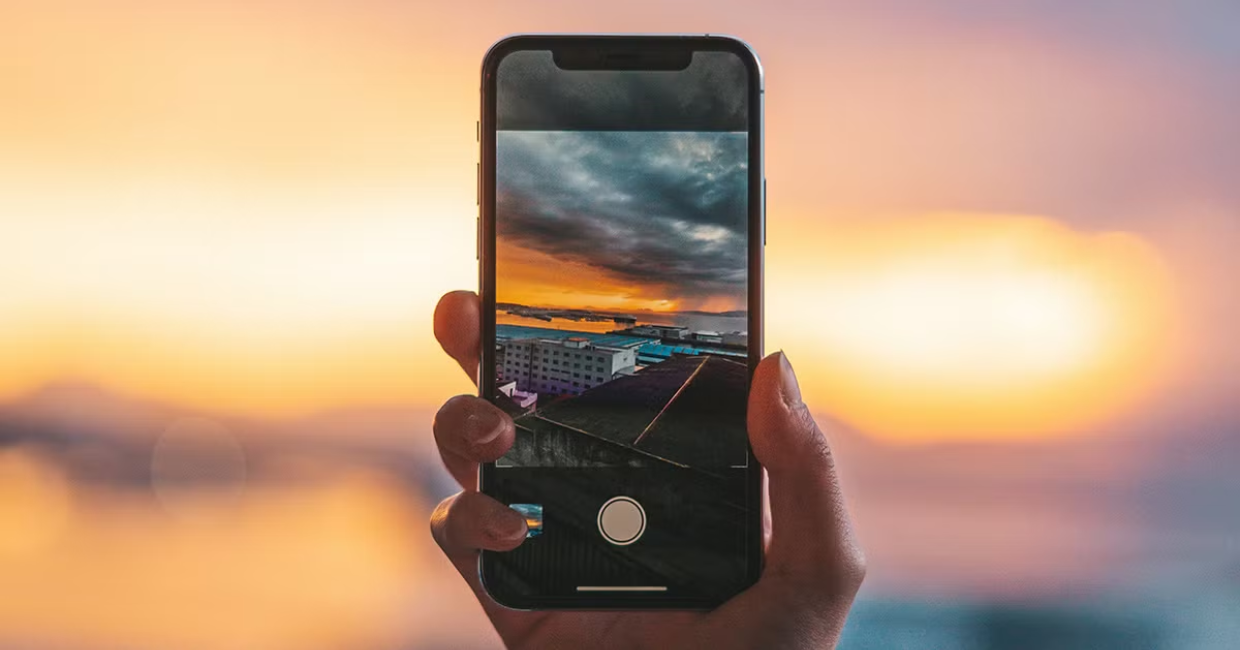
3. Manually Adjust Exposure
Ever taken a photo that was too dark or too bright? You can adjust exposure manually for perfect lighting.
How:
- Tap to focus on your subject
- Slide your finger up or down on the screen to adjust brightness
This works especially well in high-contrast settings, like sunsets or indoor lighting.
4. Master Portrait Mode
Portrait Mode creates stunning depth-of-field effects, making your subject pop against a blurred background. But it’s not just for faces.
Tricks:
- Use Portrait Mode for objects like flowers, pets, or food
- Try different lighting effects like Studio Light or Stage Light
- Tap to focus on the eyes when taking portraits
You can even adjust the depth effect after taking the photo by going to Edit > f-stop slider.
5. Use Live Photos Creatively
Live Photos are more than just moving images. They give you creative options like Loop, Bounce, or Long Exposure.
How to Access:
- Open a Live Photo
- Swipe up to see effects
Long Exposure:
This is perfect for waterfalls, traffic trails, or flowing fabric, giving your photos a DSLR-like motion blur.
6. Utilize Burst Mode for Action Shots
Capturing a perfect action shot—like a jump, pet running, or a child’s candid moment—requires precision. That’s where Burst Mode shines.
How to Use Burst Mode:
- On iPhones with Face ID: drag the shutter button to the left
- On older models: just hold the shutter button
Later, you can choose the best frame from the burst.
7. Night Mode: Shoot in the Dark
Night Mode turns dimly lit scenes into detailed masterpieces by capturing multiple frames and merging them intelligently.
How to Use:
- It activates automatically in low light
- Adjust the exposure time (the yellow moon icon) to capture more detail
Tips:
- Keep the phone still or use a tripod
- Experiment with different exposure durations for creative effects
8. Use the Timer for Group Shots and Steady Photos
The Timer is a small but mighty tool that can improve your composition and reduce blur.
How:
- Tap the clock icon at the top of the camera screen
- Choose 3 or 10 seconds
Set your phone on a flat surface or tripod, and you’ve got a perfectly still shot without the shake of tapping the shutter.
9. Try Different Lenses (Ultra-Wide, Wide, Telephoto)
Modern iPhones (like the 11 Pro, 12 Pro, and beyond) offer multiple lenses. Knowing when to use each lens makes a big difference.
Lenses:
- Ultra-Wide: Great for landscapes, architecture, and tight spaces
- Wide (Standard): Everyday use, portraits, food
- Telephoto: Close-ups, portraits, candid shots from a distance
Tip:
Avoid zooming with your fingers—use the lens options (0.5x, 1x, 2x/3x) to maintain quality.
10. Edit with the Built-in Photo Editor
Editing is where magic happens. iPhone’s Photos app includes powerful tools that are easy to overlook.
Tools to Use:
- Auto Enhance for quick fixes
- Exposure, Brilliance, and Contrast to fine-tune lighting
- Saturation and Vibrance for color correction
- Crop and Straighten to fix alignment
Remember, you can revert to the original at any time, so don’t be afraid to experiment.
11. Use Filters, But Don’t Overdo It
Filters add mood and style, but subtlety is key. The iPhone offers built-in filters like Vivid, Dramatic, and Mono.
When to Use Filters:
- To enhance a specific vibe (warm, cool, moody)
- To match a social media aesthetic
- To unify a photo set
Start with small adjustments and build from there to avoid that over-processed look.
12. Get Creative with Reflections and Shadows
Photography is about perspective, and reflections or shadows can turn an ordinary scene into art.
Ideas:
- Use puddles, mirrors, or glass for reflection shots
- Capture elongated shadows during golden hour
- Frame subjects using shadow patterns from windows or fences
Creativity doesn’t require editing—just an eye for light.
13. Shoot During Golden Hour
Golden hour—shortly after sunrise and before sunset—offers soft, warm lighting that’s flattering for portraits and landscapes alike.
Benefits:
- Reduces harsh shadows
- Adds a natural glow to skin tones
- Enhances colors in nature
Use the Weather app or a Golden Hour app to plan your shoots accordingly.
14. Try ProRAW for More Editing Control
If you’re serious about post-processing, Apple ProRAW gives you uncompressed images with more detail and editing flexibility.
How to Enable:
- Go to Settings > Camera > Formats
- Turn on Apple ProRAW
ProRAW files are larger but allow more precision when editing in Lightroom or Photos.
15. Lock the Horizon with Level Tool
Ever take a photo where the horizon is slightly tilted? Your iPhone helps you line it up perfectly.
How:
- Turn on Grid in camera settings
- A yellow cross will appear when the phone is level
This is great for architectural photography, food shots, and anything with strong horizontal lines.
16. Clean Your Lens!
It sounds obvious, but many iPhone photos look blurry simply because of a dirty lens. Wipe your camera lens with a microfiber cloth before you shoot.
Common Culprits:
- Finger smudges
- Pocket lint
- Dust from your bag or case
A clean lens = a sharp image. Always.
17. Use External Lenses for Creative Shots
Several third-party manufacturers (like Moment or Sandmarc) offer external lenses that attach to your iPhone.
Popular Options:
- Macro lenses for extreme close-ups
- Fisheye lenses for wide, distorted effects
- Anamorphic lenses for cinematic video
These expand your creative possibilities without needing a DSLR.
18. Control Shutter Speed with Third-Party Apps
The default Camera app doesn’t let you adjust shutter speed, but apps like Halide, ProCamera, or Manual give you DSLR-style control.
Why Adjust Shutter Speed?
- Fast shutter to freeze action (sports, wildlife)
- Slow shutter for motion blur (light trails, water flow)
Pair with a tripod for the best results.
19. Keep It Simple: Watch Your Background
A cluttered background can ruin a great subject. When composing your shot:
Tips:
- Move around your subject to find cleaner backgrounds
- Use Portrait Mode to blur the mess
- Zoom in slightly to eliminate distractions
Photography is about storytelling—make sure your background supports the story, not distracts from it.
20. Practice, Review, Repeat
The final trick to mastering your iPhone camera? Practice. The more you shoot, the better you’ll understand light, angles, and timing.
Create a Workflow:
- Shoot from different angles
- Try various editing styles
- Compare your shots and see what works
- Seek feedback and learn from others
Great photos aren’t always about gear—they’re about practice and perspective.
Final Thoughts
Your iPhone is far more than a casual camera—it’s a creative powerhouse. With the right techniques and a touch of curiosity, you can capture images that rival professional setups. Whether you’re shooting portraits, landscapes, or candid moments, these iPhone camera tricks will instantly improve your photography game.
So go ahead—grab your phone, find the light, and start shooting. The best camera is the one you have with you—and with these tips, it’s also the smartest.